Group Types
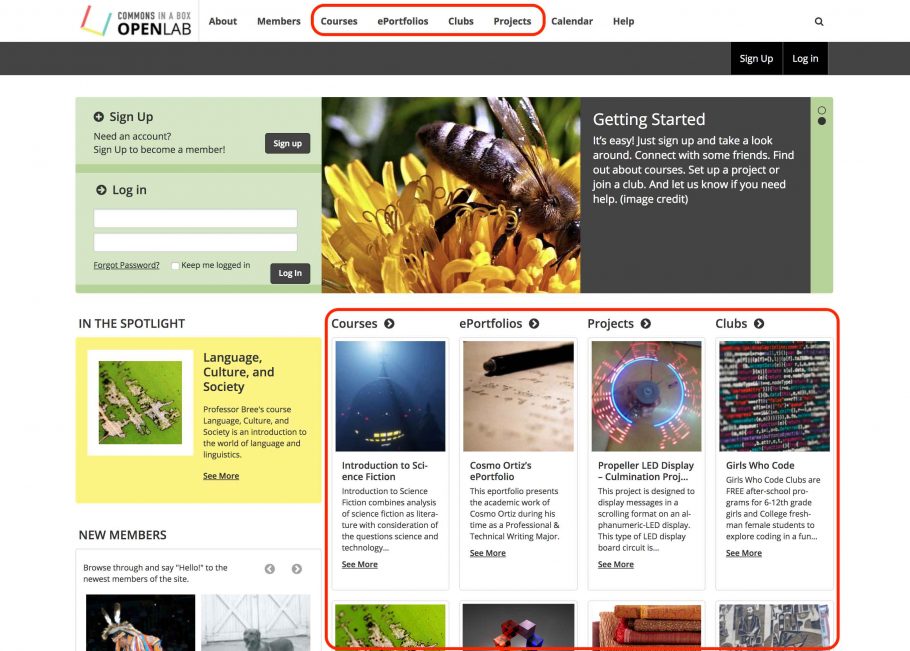
CBOX OpenLab extends the concept of CBOX groups by creating four different types of default groups: Courses, Projects, Portfolios, and Clubs.
CBOX OpenLab admins can customize the settings for each of these by going to Dashboard > CBOX OpenLab > Group Settings.
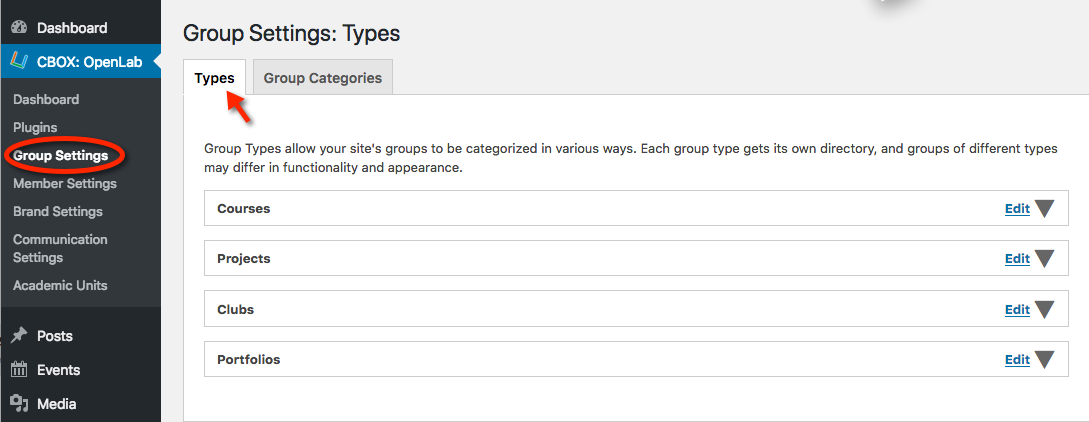
Click on the “Edit” arrow of any group type to customize. As you can see below, admins can rename any of the four group types, turn group types off or on, change the order, and configure other options.
If you decide not to use all four, we recommend three group types as the minimum for optimal homepage display. Two is possible, but not ideal, and one group type will result in a homepage that looks incomplete. If you decide to disable a group type, you will also need to turn off the display of that group type on the homepage by going to CBOX OpenLab > Brand Settings > Visual. Instructions for this are included in the Brand Settings: Visual documentation.
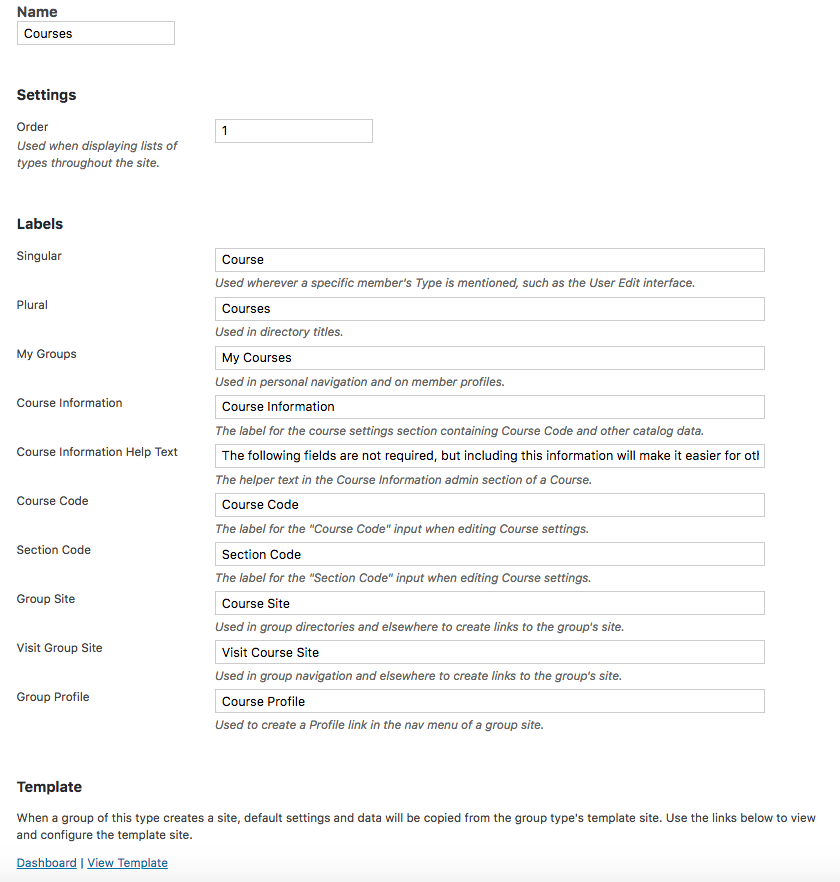
Settings: Order
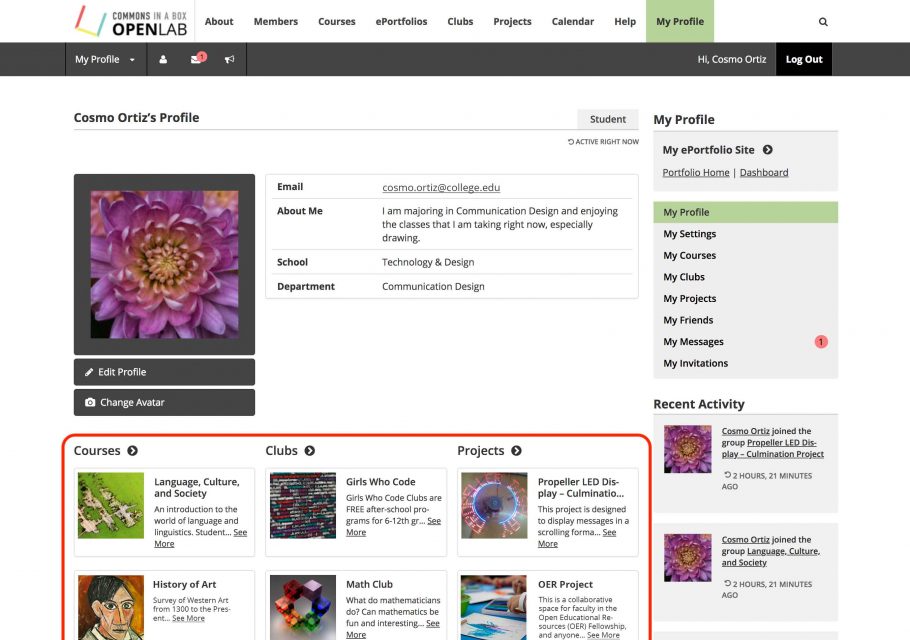
The “Order” setting allows you to change the order in which group types appear in certain places throughout the site. For example, when viewing a member’s profile, group types appear in the right-hand sidebar, and under the member avatar and profile information, in the order specified in these settings. Please note: to change the the order that these group types appear on the homepage, you will need to go to Brand Settings > Visual/Customize > Home Page. Instructions for this are included in the Brand Settings: Visual documentation.
Labels
The Labels section allows you to change the terminology used for group types throughout the site, for example on a member’s profile page or during group creation. This list of manual entry terms, while lengthy, allows for translation of the package into any language while still retaining clear and user-friendly language on the front-end. If you keep the default group type names, the labels are unlikely to need any changes, but if you change a group type name, you will need to change it in the labels section.
Group Templates
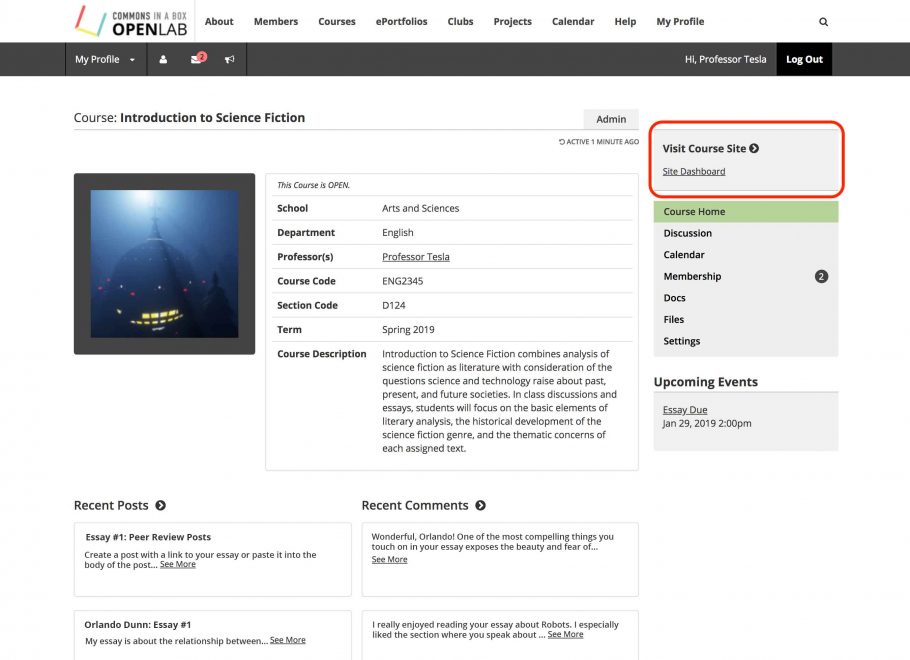
Groups may have associated WordPress sites. Certain group types include a site by default (e.g. Courses) or can’t be created without a site (e.g. Portfolios). (Unlike CBOX Classic, sites in CBOX OpenLab cannot exist without an associated group.)
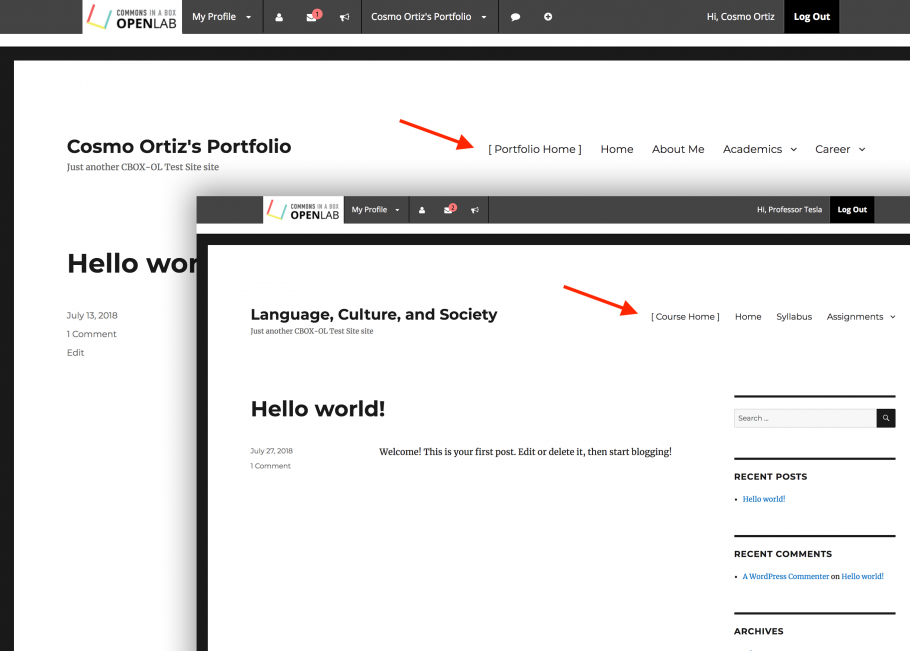
Group template sites allow CBOX OpenLab admins to create different default structures for the sites associated with different group types. For example, Course Sites have a different set of default pages (e.g. Syllabus and Readings) than Portfolio or Club Sites. This is because the group templates for those group types are set up differently.
Configuring Group Templates
Site templates define how a newly created site will be structured, allowing members to create well-designed sites from scratch.
On the front end, the template chooser functionality allows members to select from different site templates when creating a group. Different disciplines might have different site templates for courses or portfolios. For example, student portfolios in nursing would likely have a different structure and contents than portfolios in a visual design field.
Group template sites allow CBOX OpenLab admins to create different default structures for the sites associated with different group types. For example, Course Sites can have a different set of default pages (e.g. Syllabus and Readings) than Portfolio or Club Sites. This is because the group templates for those group types are set up differently.
You can also have multiple templates for different group types. For example, you might have a course template for more active sites, with regular student activity, or a site that is more informational, with faculty announcements. You could also have a template for a visual arts or media course, with a more media-focused theme.
Creating new templates
1. Go to Dashboard > Site Templates and click Add New.
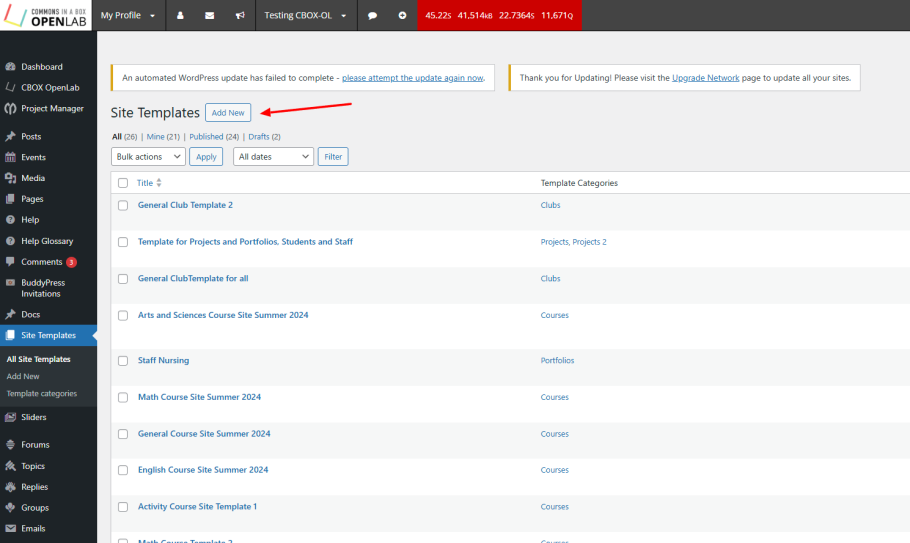
Fill the name of the template and the description fields so that members creating a new group site will understand which template they should choose and how it will best fit their site.
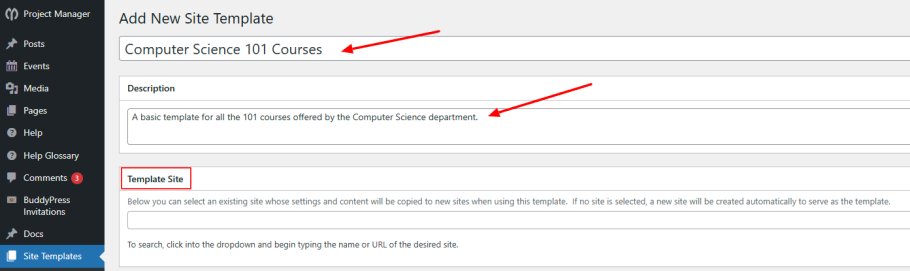
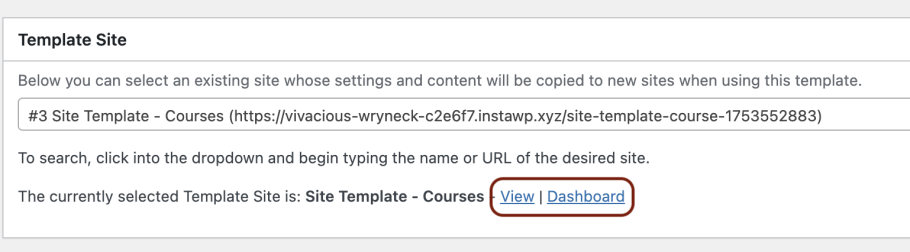
Here you’ll have the choice to use an existing site for the template or create a new site. If you’re using an existing site, start typing in the name of the site to search, and select it from the dropdown.
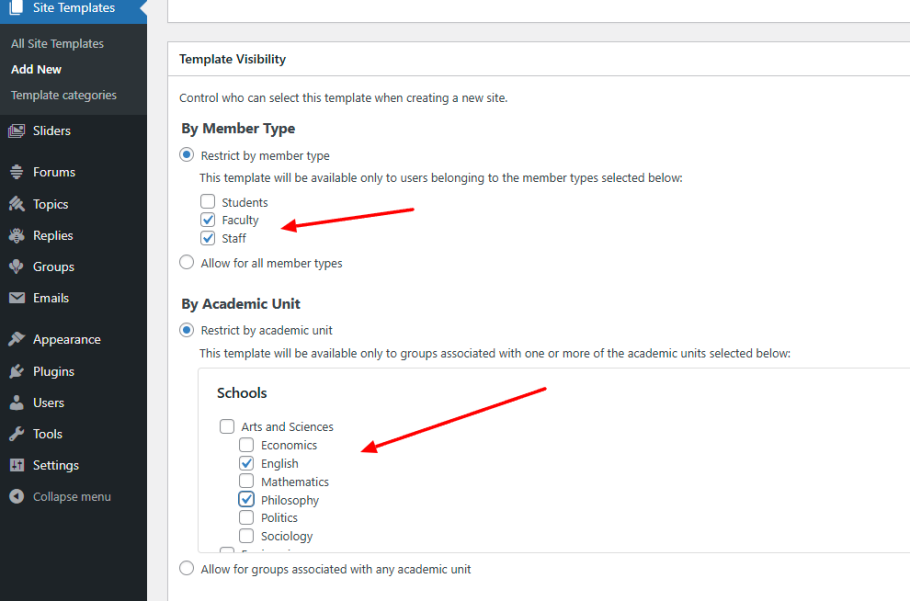
By default, all members and groups in any academic unit have access to a template, but you can change this to restrict by member type and/or academic unit.
In restricting by Member Type, you can decide which members should see this template when creating a new site.
In restricting by Academic Unit, you can select which schools, departments, or other units will have access.
For example, if you have a template for student portfolios in the Nursing department, you can choose to make this template available only for students creating a portfolio in the nursing department.
Next, choose a category, and a featured image that will appear when members are choosing a template for their site. Categories serve as the method for linking Site Templates to Group Types. You can choose one of the default categories for the group type (e.g. General: Courses for a course template) or create a new category.
When you’re finished, click Publish and your site template will be created and available.

You can edit your site template just like you edit any site. You can change any of the elements like the theme, widgets, and plugins, as you would in any WordPress site. You can also create a navigation menu, and default pages and posts. These will all be applied to any new site created for a particular group type, but can be modified as needed by the site’s creator.