CBOX OpenLab is a comprehensive package that will have a significant impact on the appearance and functionality of an existing site; it is best implemented on a new WordPress Multisite installation. If you wish to add CBOX OpenLab to an already-existing WordPress, WordPress Multisite, BuddyPress, or CBOX Classic installation, this can be done. However, you will need to perform some additional steps after installing CBOX OpenLab, so that your existing data appears and functions correctly within the CBOX OpenLab interface.
For existing installations with large amounts of data, you may wish to accomplish these steps via script.
Customize & Assign Member Types
All members of a CBOX OpenLab installation must have a Member Type, such as “Student” or “Faculty”. CBOX OpenLab comes with a set of default Member Types (Student, Faculty, Staff, and Alumni). Once CBOX OpenLab has been installed, you can customize these types to meet the needs of your community; see Member Types [link] in Configuring CBOX OpenLab below for instructions.
You will then need to set the Member Type for each existing user. To add or modify the Member Type of existing users, go to Dashboard > Users, where users may be modified individually, or in bulk. (Please note: bulk modifications can only be done on the main site Dashboard > Users, not in Network Admin.) This process can also be scripted; see the function bp_set_member_type().
To make bulk changes, check the users you want to change, choose the appropriate member type in the Change member type to… dropdown, and click Change. To make individual changes, hover over a user’s name and click the Extended link to edit the users Extended Profile.

On the Extended Profile tab. Under Member Type, choose the appropriate member type in the dropdown, and click Update Profile.

Customize & Assign Group Types
All groups in a CBOX OpenLab installation must have a Group Type, such as “Course” or “Portfolio”. CBOX OpenLab comes with a set of default Group Types (Course, Project, Club, and Portfolio). Once CBOX OpenLab has been installed, you can customize these types to meet the needs of your community; see Group Types [link] in Configuring CBOX OpenLab below.
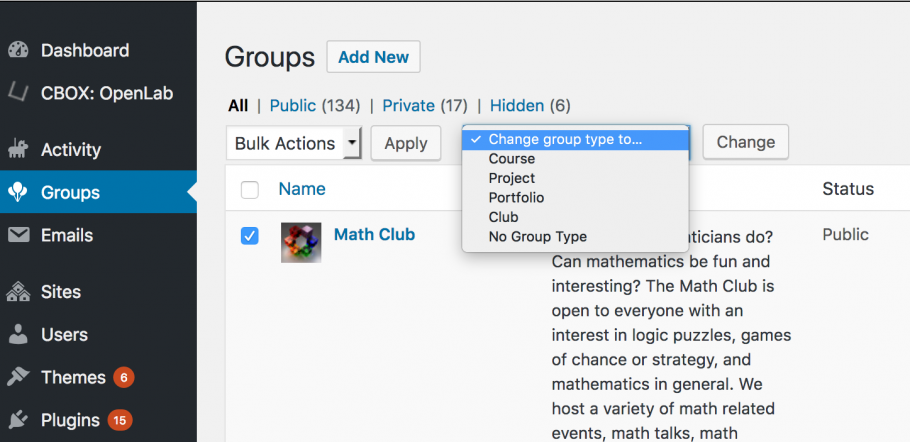
If you have an existing BuddyPress or CBOX Classic installation, you will then need to assign a type to any existing groups, so that CBOX OpenLab will function correctly. Groups that do not have a valid Group Type will not appear in directories, on the home page, or on member profiles, so it is important that any existing groups be assigned types. To add or modify the Group Type of existing groups, go to Network Admin > Groups, where groups may be modified individually or in bulk. This process can also be scripted; see the function bp_groups_set_group_type().
To make bulk changes, check the box next to the groups you want to change, choose the appropriate group type in the Change group type to… dropdown, and click Change.

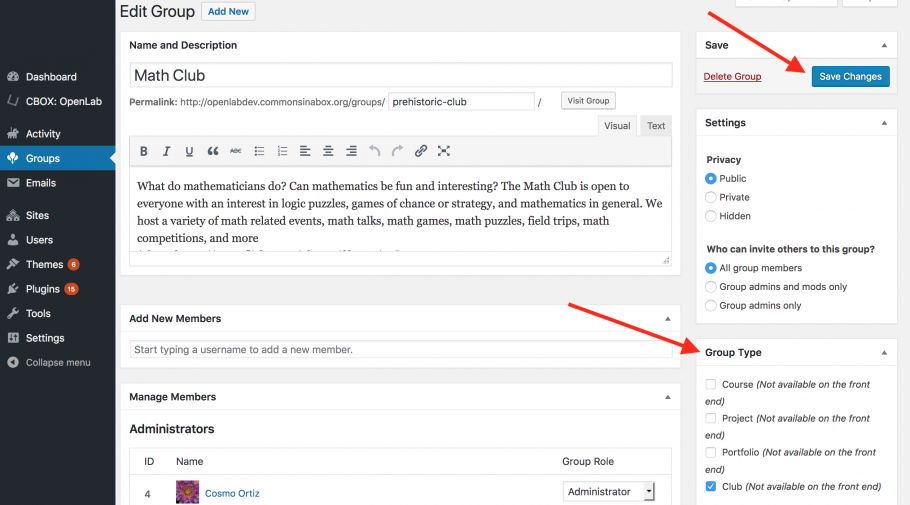
To edit an individual Group, hover over the Group’s name and click Edit. On the Edit Group screen, under Group Type, choose the appropriate type, and click Save Changes. Please note: while it is possible in this interface to assign multiple Group Types to one Group, Groups on a CBOX OpenLab installation should only have a single Group Type.

Create Groups for Existing WordPress Sites
All individual WordPress sites in a CBOX OpenLab installation must be associated with a group. Any existing WordPress sites that are not linked to groups will continue to be available as standalone sites, but they will not appear anywhere in the CBOX OpenLab interface. If you wish a site to be accessible via the CBOX OpenLab interface, you will need to create a new group of the appropriate type and link the site to it. This process can also be scripted; see the function cboxol_set_group_site_id().
We recommend scripting the process, if possible. If not, you will need to either (1) make yourself an admin on all unlinked sites and then follow the steps below for group creation and linking, or (2) ask the current site admins to follow the steps below to create and link new groups to their sites.
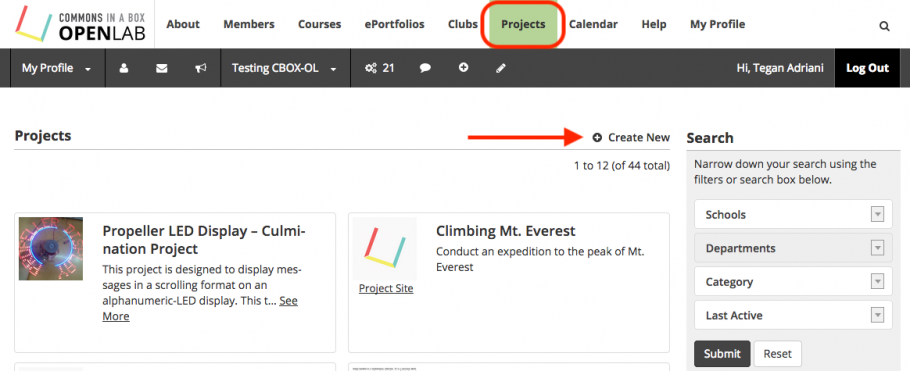
To create a new group, go to the directory page of that group (i.e. Courses, Projects, etc.) and at the top click + Create. Or, go to My Profile, and then My Courses, Projects, etc, depending on the type of group you want to create, and click + Create New.


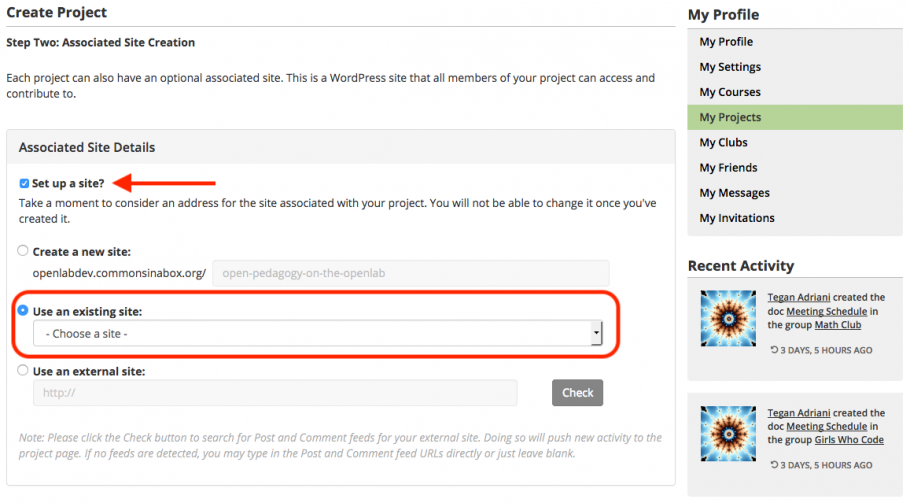
Complete the first step of group creation with the appropriate information. On the second step, click “Set up a site?” if it’s not already clicked by default (this will differ depending on the group type). Choose Use an existing site, and then choose the site you want to link to the group you’re creating.

Finish the process of creating the group, and repeat as necessary for each site you would like to link to a group.
