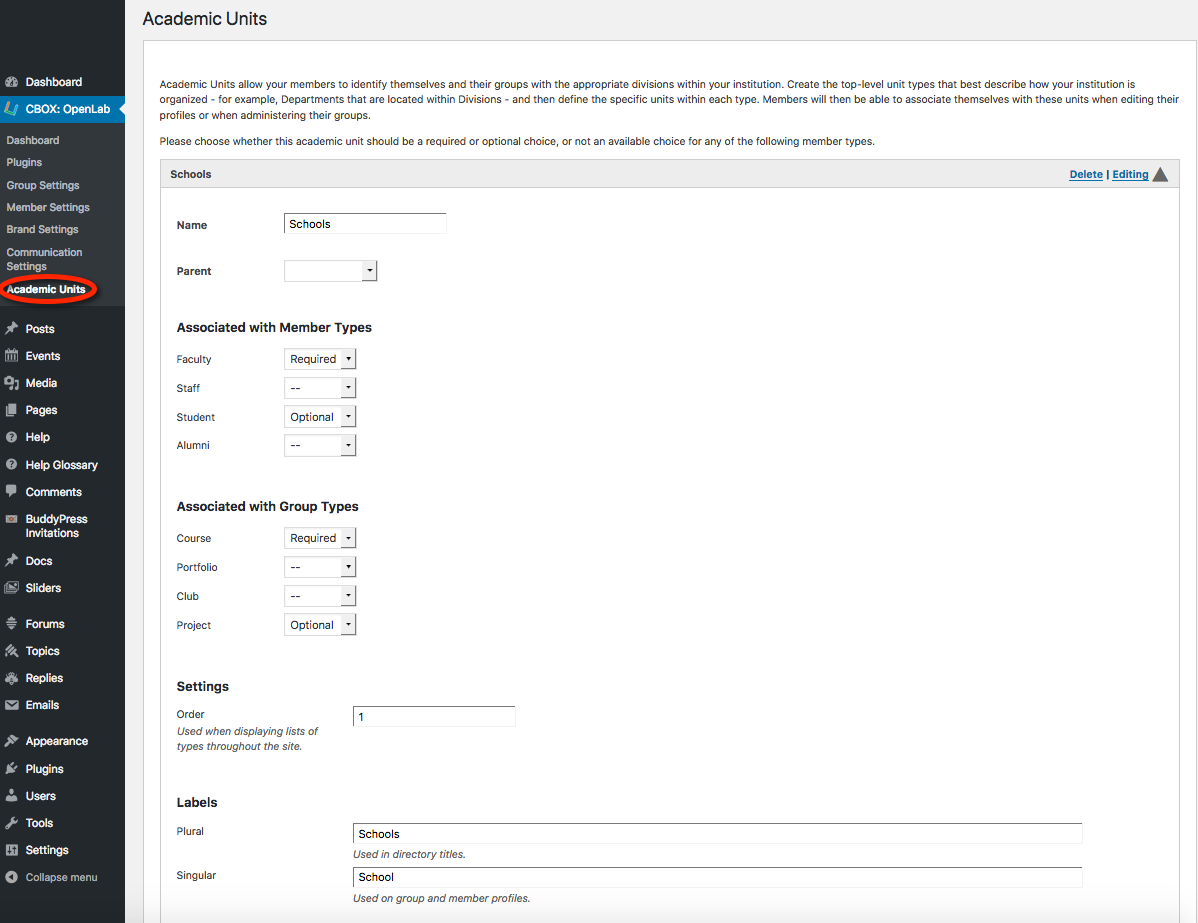
CBOX OpenLab admins can customize the academic units that are appropriate for their institution by going to Dashboard > CBOX OpenLab > Academic Units.
Academic Units can be organized in multiple levels of hierarchies (e.g. parents, children, grandchildren, etc). The default type of academic units is Schools as the parent and Departments as the child, but the names of these can be changed, and there are a number of options to customize, depending on the needs of your institution.
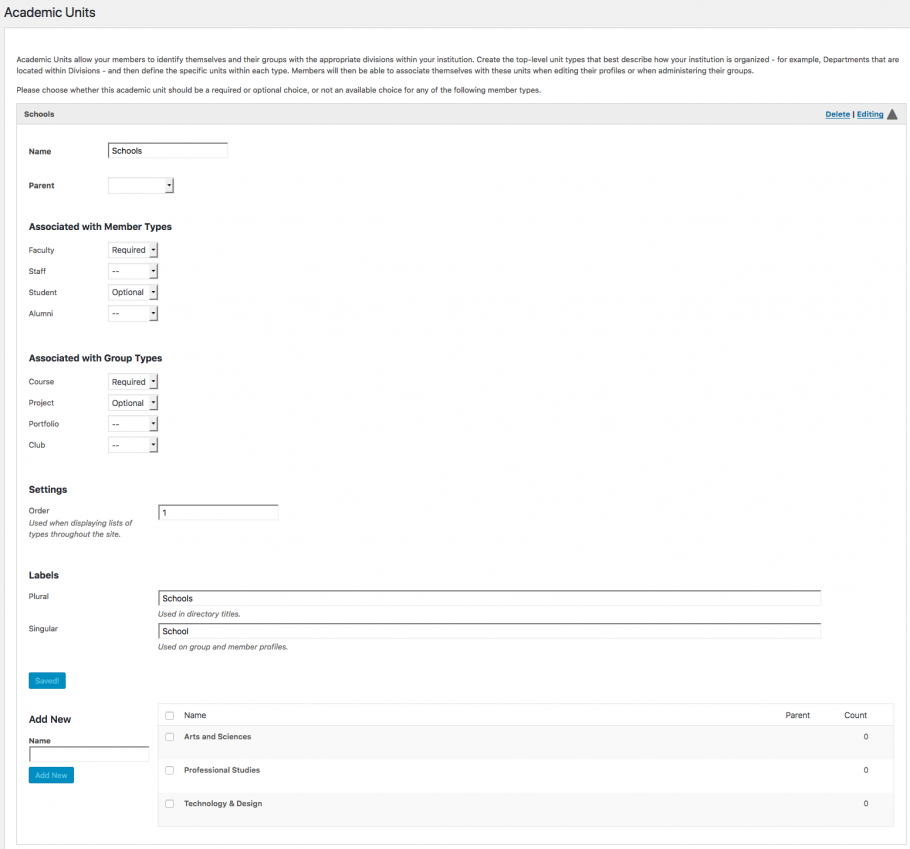
On the screen shown below you can add, delete, or edit, a unit.
Click the Edit arrow to see all customization options. Here you can change the name or parent/child relationship.

Associated with Member Types
In this section, you can choose whether an academic unit should be Required or Optional for a particular member type when they sign up for an account; if you choose “–” they won’t see the field during account creation or when editing their profile. For example, you might want to make academic units required for faculty or optional for students.
Associated with Group Types
You can also choose which group types are required to be associated with academic units. For example, it’s helpful for courses and portfolios to be associated with academic units so that students and other members can easily filter for courses by school and department (or whatever academic units are applicable at your institution). For projects and clubs it’s probably useful for academic units to be available, but they may be optional rather than required.
Settings: Order
Here you can choose the order in which academic units appear in lists throughout the site. If you don’t specify and order the default is alphabetical.
Labels
If you change the name of the units (e.g. from Schools to Colleges), you will also need to change the singular and plural labels.
Add New
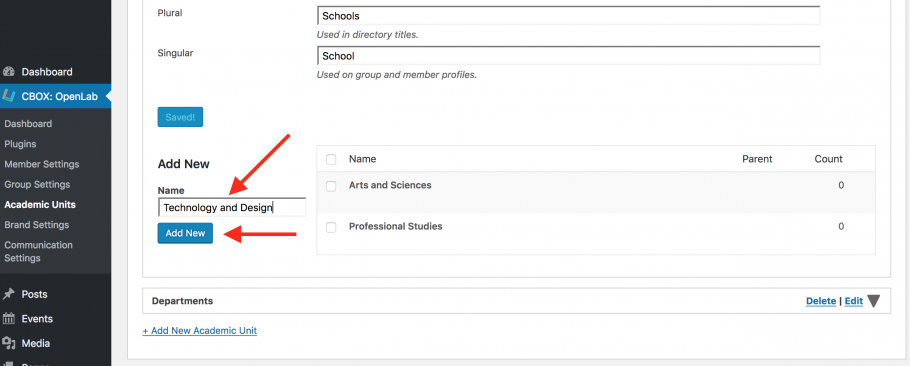
In the section beneath Labels, you will populate the unit names. In the example above, within Schools we’ve added “Arts and Sciences,” “Professional Studies,” and “Technology and Design.”
To add a unit, enter the name in the box beneath Add New and click the Add New button. You’ll see it appear in the list on the right. Once in the list, you can delete or edit existing units by hovering your mouse over the name. Here you can edit the name or specify the order the units appear.

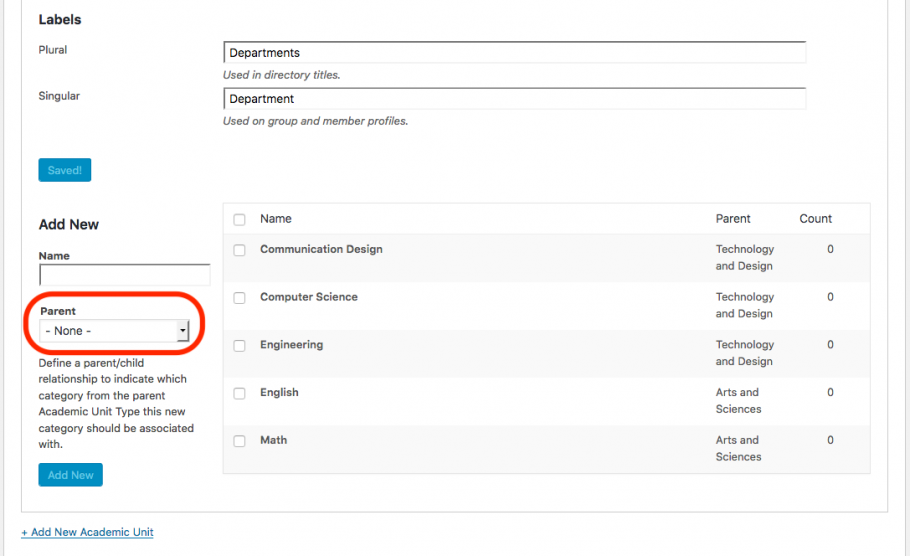
Once you’re finished with the parent units, you will want to edit the child units (“Departments” in the example above).
When you click the edit option, all the same options appear as with the parent unit, with one difference. When you populate individual child units at the bottom, you’ll need to specify the parent unit to which they belong. For example, you might add “English,” “Math,” and “Communication Design” as departments. These have different parent units (Schools), so you will need to specify the school, for example, “Arts and Sciences” for English and Math, and “Technology and Design” for Communication Design.


