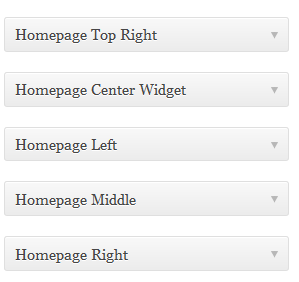
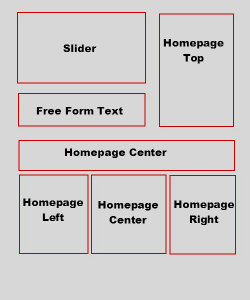
 When you download CBOX Classic and activate it’s default theme, your site is configured to open up to a Home page that implements the theme’s “Homepage Template.” This template includes a nice slider at the top, a widgetized area (called the “Homepage Top Right”) which can hold some Welcome and Register/Login information and/or implement the “Featured Content Widget” plugin that lets you feature a particular post, group, or wiki page. A free form text area appears directly under the slider, and directly below that is a full width center widget (called the “Homepage Center Widget) which typically contains a widget called “Recently Active Members Avatars.” Three footer widget areas (“HomePage Left”, “Homepage Center,” and “Homepage Right”) finish off the page.
(There is also a header and three footer widgetized areas that appear on all pages.)
The widgetized areas are populated from your dashboard, by going to “Appearance>>Widgets.” See screenshot, right.
The free form text area that appears directly below the slider is controlled via the “Appearance>>CBOX Theme Options>>Home Page>>Slider Header.”
The diagram on the left provides a more graphic view of the setup.
If you don’t want a slider on your site, you can switch your home page to a different template. The theme includes eight page templates. (You can also just turn off the slider from CBOX Theme Options panel, but you will be left with a blank space on the upper left hand of your site, and will probably need to do a little CSS work to fix it.)
Many CBOX Classic adopters are confounded by the slider. How do you get images into it? What is the best size? How do you control the caption below? What about links? Can you adjust the transition speed?
Creating CBOX Classic Slider Images
There are two ways to get images into the slider, and you control which one you are going to use by going to “Appearance>>CBOX Theme Options>>Home Page>>Slider Setup”:

The options in the dropdown are: Show Site Features, Show Featured Posts from a Category, or Do Not Display.
 Option 1: Show Site Features
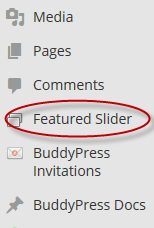
This is probably the easiest and most popular way to get your images into the slider. On your WordPress dashboard you’ll notice that CBOX Classic has added an option called “Featured Slider.” Click on “Add Slide” to add an image to your slider, or “Feature Slider” to see all your current slides.
Featured sliders are really just custom posts designed to work with the CBOX Classic homepage template. Provide a title and optionally some text just like you would for any WP post. This information will appear at the bottom of the slider, when it is displayed. The more text you enter here, the more your image will be obscured, so take care.
 To add the image, you can either click on the “Set featured image” hyperlink on the right column, or “Add Media”. No matter which option you choose, please ensure that you set the image as a featured image. When you’ve done it right you should see it in a box in your post panel (see the screenshot on the left).
Publish your new Featured Slider and go to you home page, and you should see it displayed. Continue to add Feature Sliders, repeating the steps above.
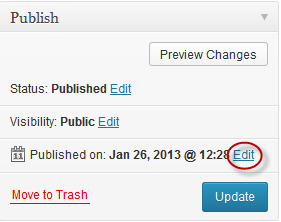
You can control the order of your slides by editing the publish date. The oldest will appear first.
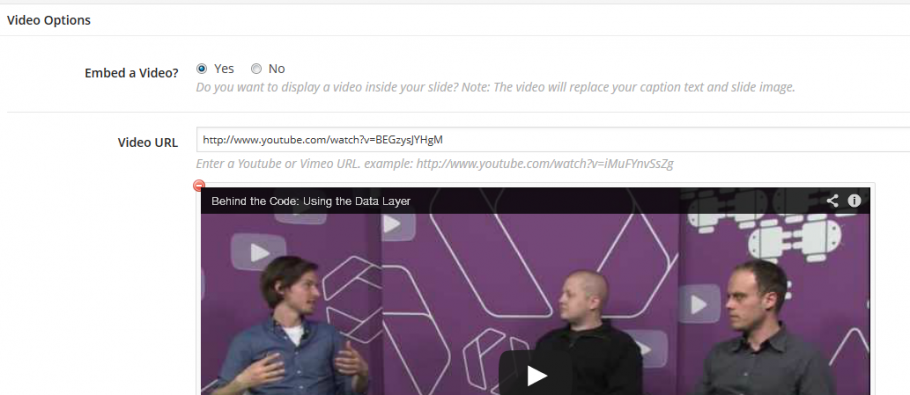
You can also create a Featured Slider from a video. Scroll down to “Video Options”, click on the Embed a video checkbox, and provide its YouTube or Vimeo URL. See screenshot below:
Option 2: Show Featured Posts by Category
Another way to get images into the slider is to use regular WordPress Posts (rather than Featured Slider), and assign a special category to the ones you want to appear in the slider. The image process is the same as described above – you need to set a featured image for it to appear in the slider.
The category you choose needs to be identified in “Appearance>>CBOX Theme Options>>Home Page>>Featured Slider Category.” You can also control the number of posts you want to feature.
Controlling your slides by category offers a way to easily change your slider contents by simply changing the category – either on the post, or on the options page.
 Order of the Slides
The slider displays images in the order they were published, from oldest to newest. If you want to change the order, you can simply edit the publish date of the site feature or post. (See screenshot, right.)
Slider Settings and Best Practices
Try to be as consistent as possible with the sizing of your featured images. The theme will scale images down, but not up. The default slider size is 670 pixels wide and 345 pixels high. This seems to work well with the (optional) “Featured Content Widget” plugin.
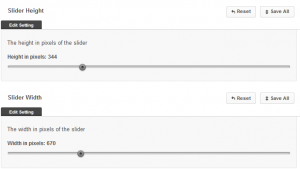 You can change the size of the slider by going to Appearance>>CBOX Theme Options>>Home Page and adjusting, as shown on the left.
If you have slides that vary in size a lot, you may be unhappy with the results. Try to resize images prior to uploading and creating slides.
You can create hyperlinks in the text portion of your slide just a regular post or page. Clicking on the image itself will by default take you to your slide’s post. If you want to re-direct the link to some other place on your site, you can use the “Custom URL” textbox on the Featured Slider’s page.
Transition speed (the time it takes to go from one slide to the next) can be controlled by going to “Appearance>>CBOX Theme Options>>Home Page>>Transition Time.”
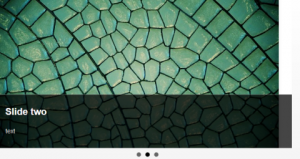 Also, please note that if you upload a slider image with a width less that your default slider size, you will probably run into a problem with your caption overlay. The caption box will be wider than your slider image, as pictured in the example on the right. To fix this, resize your image so that is is at least as wide as the default slider width, and re-upload the image.
Multi-site: Turning the slider on for sub-sites
You are able to use the slider on your sub-sites.
However, for the slider to work, you will need to use the theme’s special homepage template. To do this:
- Make sure you are using the CBOX Classic’s theme on your sub-site.
- Create a page dedicated for your homepage by clicking on “Pages > Add New” in the WP admin dashboard. Give your page a distinct name that you’ll remember like “Home.”
- Next, on that same page, under the “Page Attributes” box, click on the “Template” dropdown and select “Homepage Template”. Next, save your changes. Congratulations! You’ve just created your page, but we still need to set it as the actual homepage.
- To set your newly-created page as your homepage, navigate to “Settings > Reading” in the WP admin dashboard.
- This should take you to the “Reading Settings” page. You should see a radio button titled “A static page (select below).” Select it.
- Next, for the “Front page” dropdown menu, select the page we created in step 3 and save.
- Your homepage should now be set! Now, you can configure your slider under “Feature Slider” as detailed above.

